How to Connect Your Cloudflare Stream Account to ReedTV (Step-by-Step)
If you're on the BYOA or Pro plan, ReedTV uploads your videos straight into your own Cloudflare Stream account. To do that, ReedTV needs two things from your Cloudflare dashboard: an API token with the right Stream permissions, and your Account ID.
This guide walks through exactly how to create both — including which permission template to pick, because the wrong one will let you connect successfully but silently break uploads. Total time: about 3 minutes.
Part 1 — Create the Cloudflare API Token
Step 1. Open your Cloudflare profile
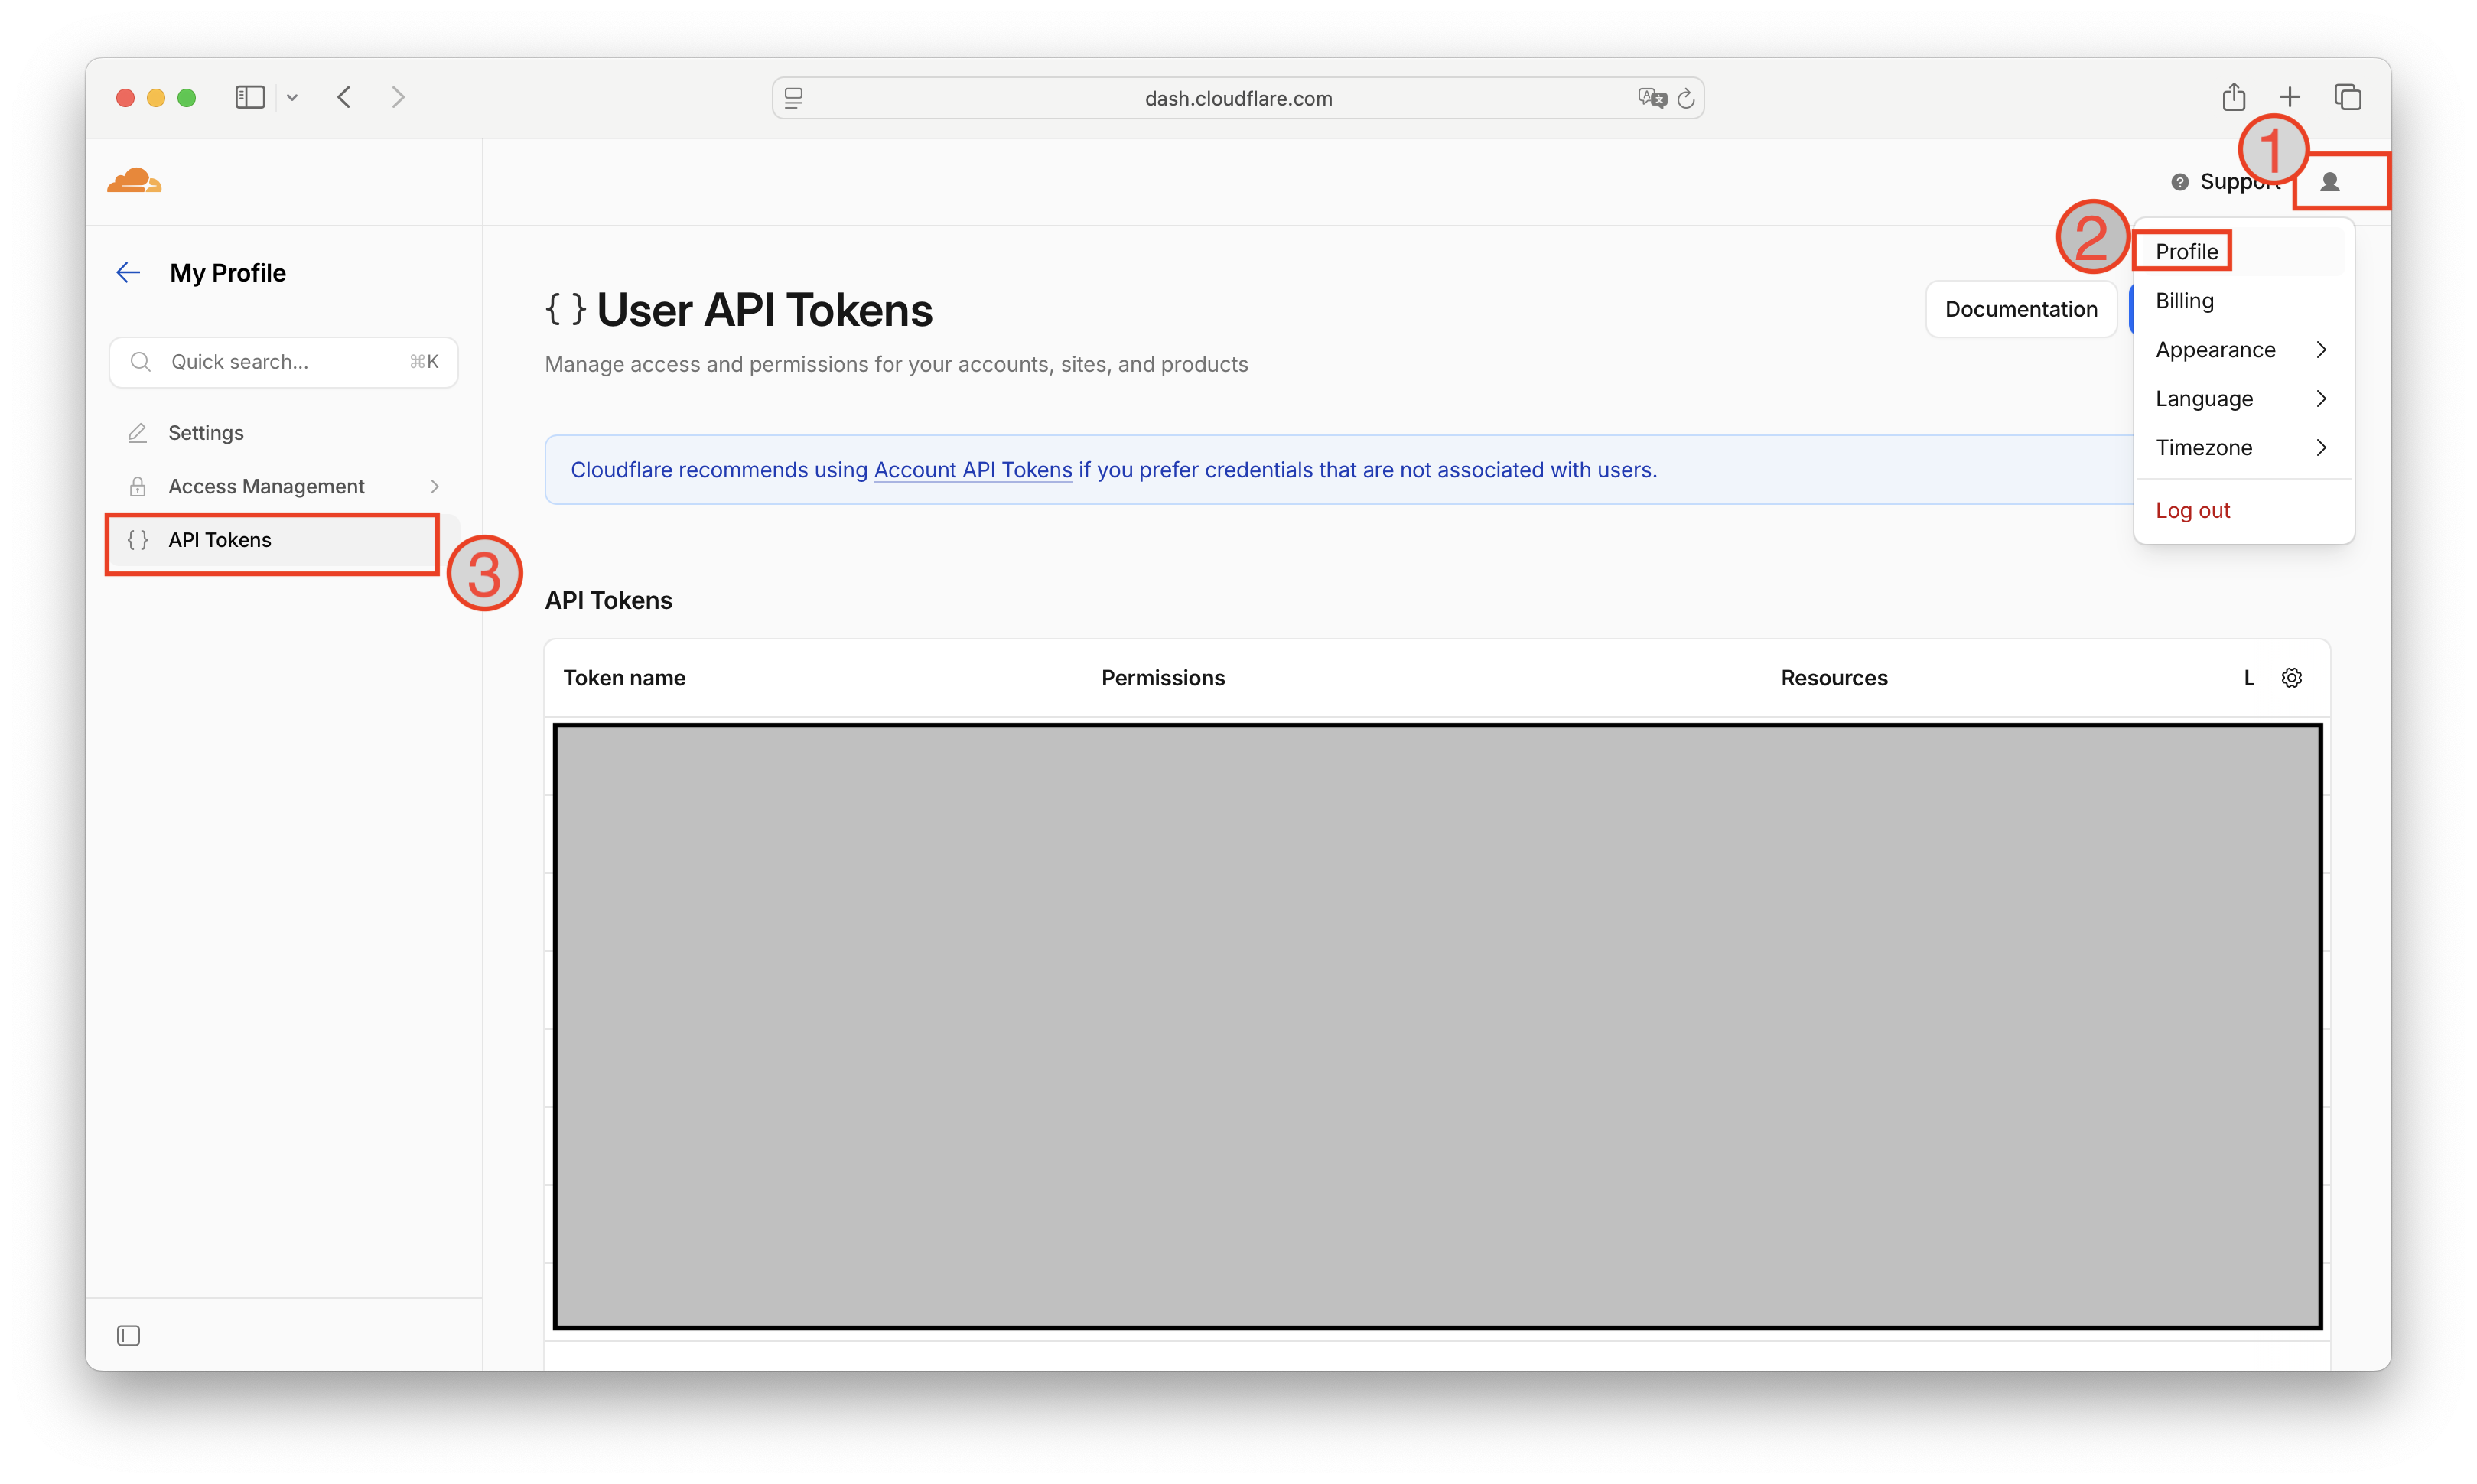
Sign in at dash.cloudflare.com. In the top-right corner, click your profile icon ❶, then choose Profile ❷ from the dropdown. From the left sidebar, click API Tokens ❸.
Step 2. Start a new token
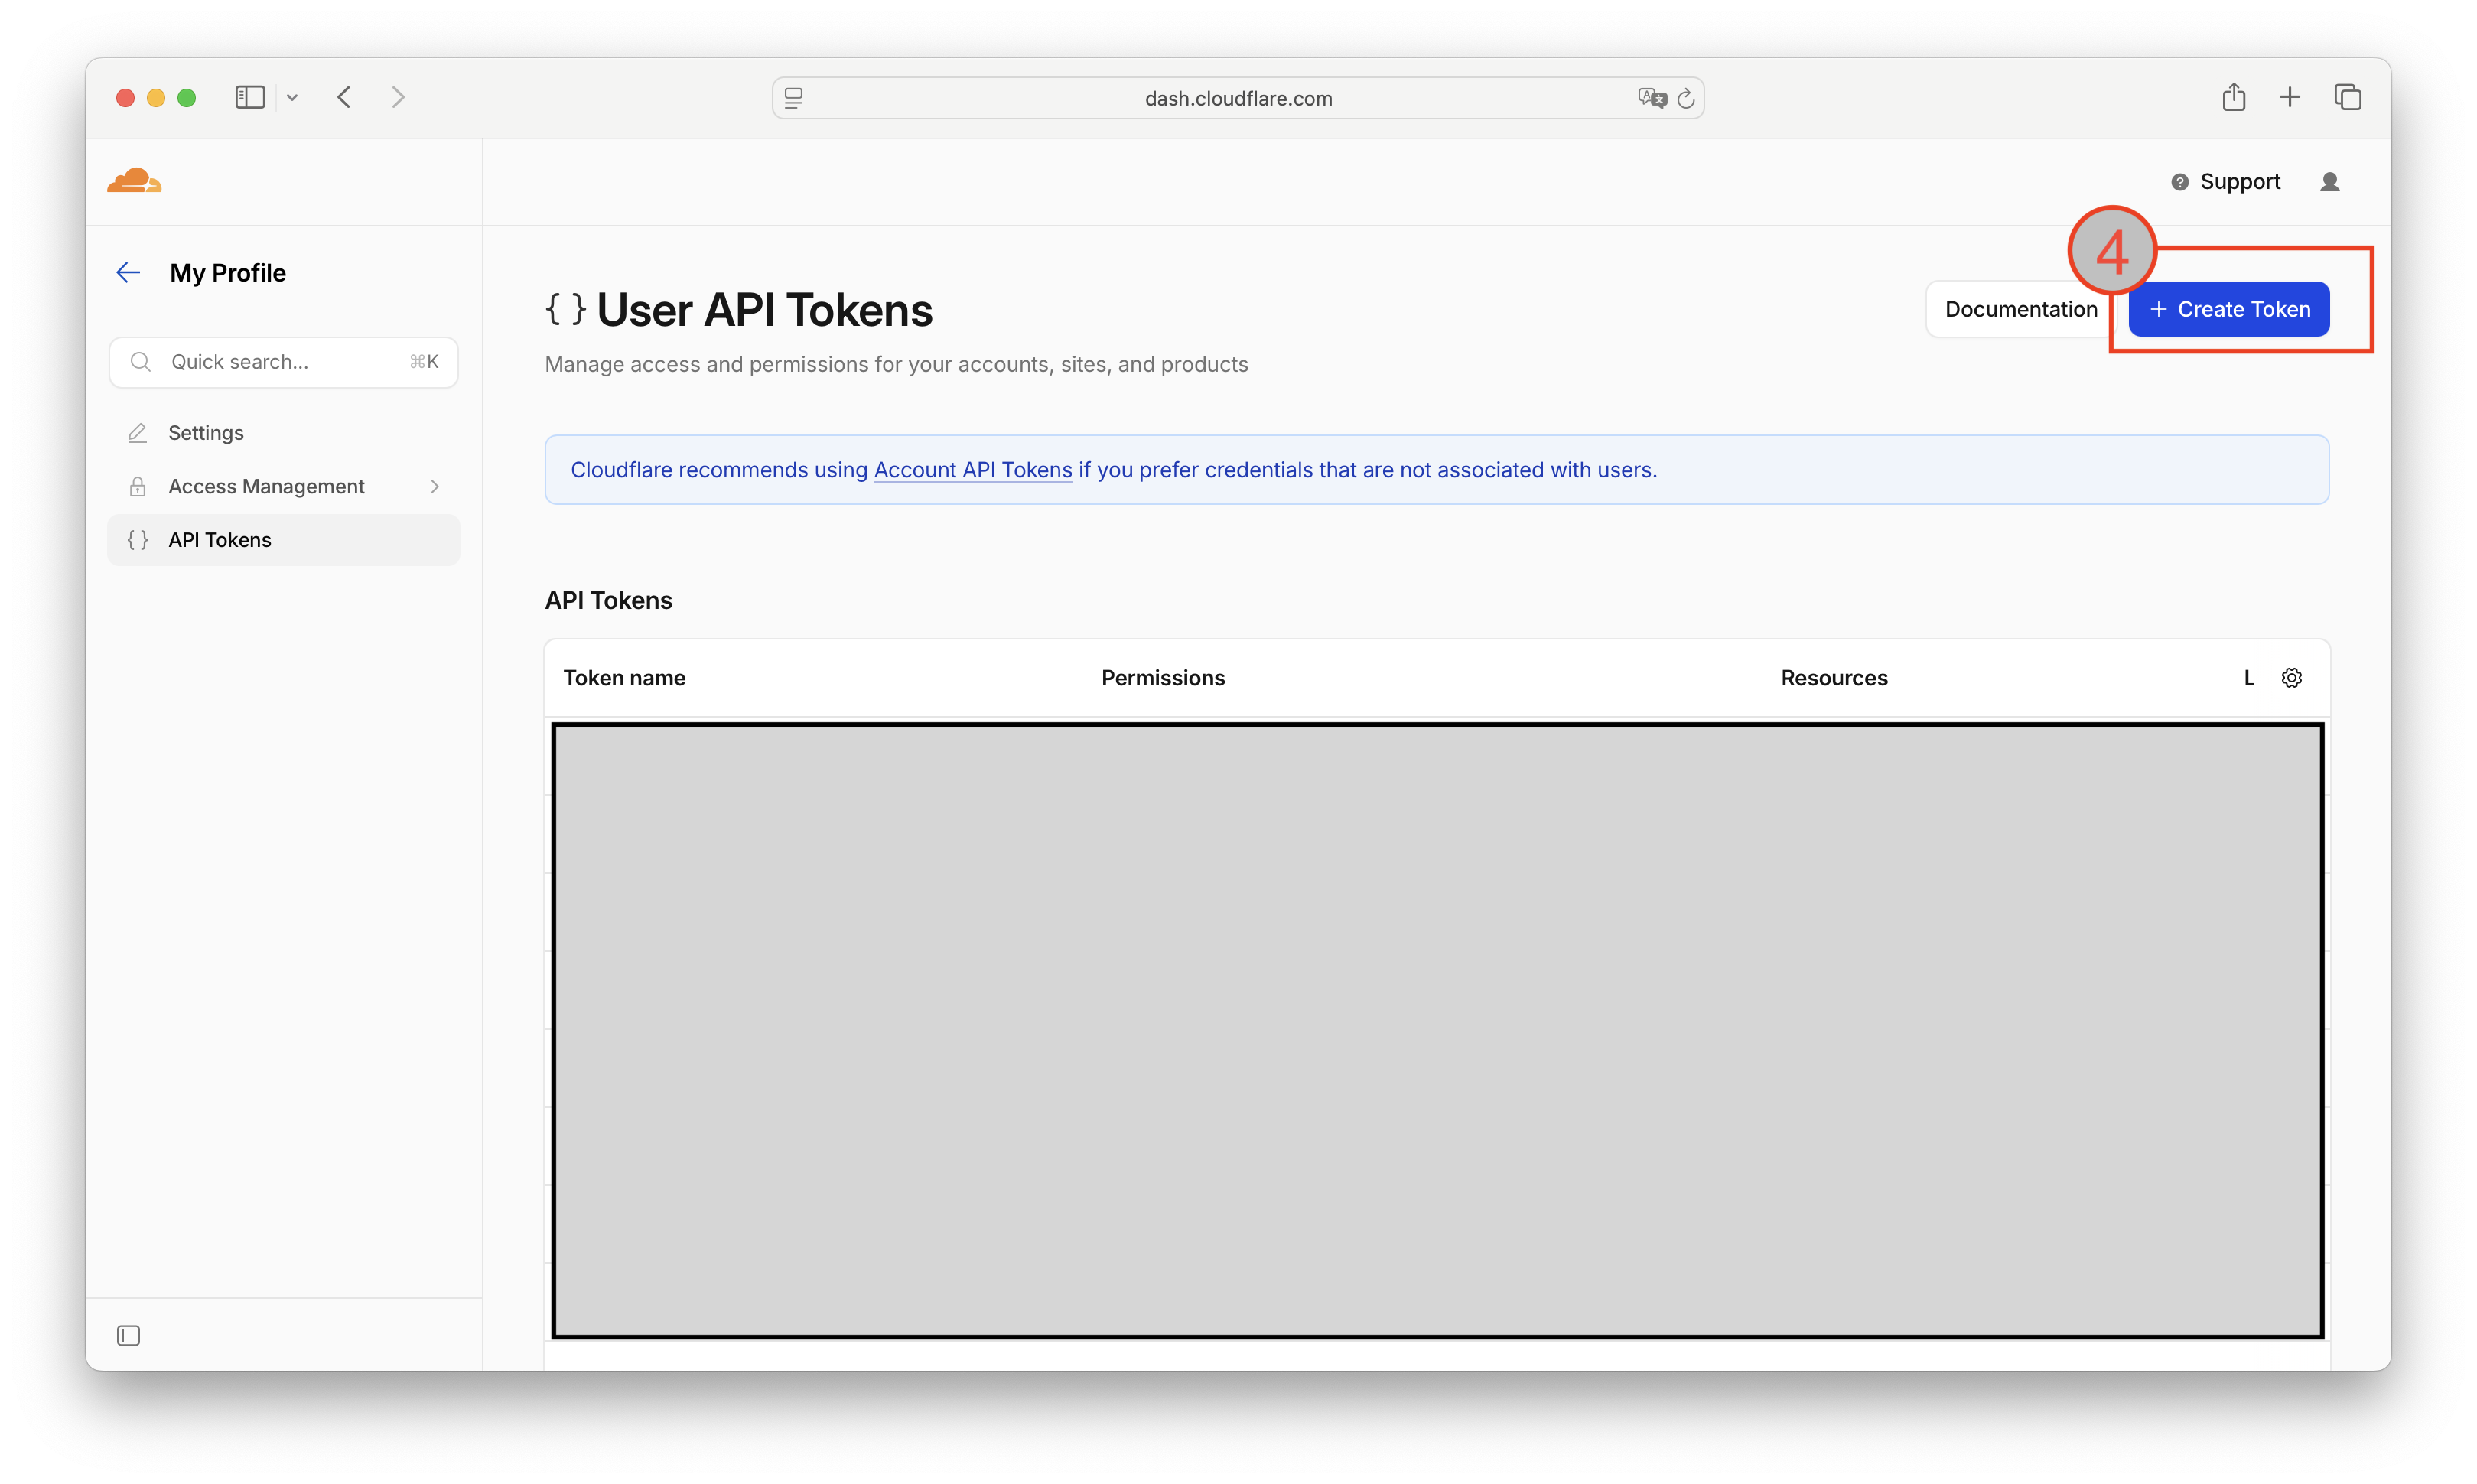
On the API Tokens page, click the blue + Create Token button ❹ in the top-right.
Step 3. Pick the right template
Cloudflare offers several templates. Scroll down and click Use template next to "Read and write to Cloudflare Stream and Images" ❺. This is the one — it grants exactly the permissions ReedTV needs to upload, list, and manage videos in your account.
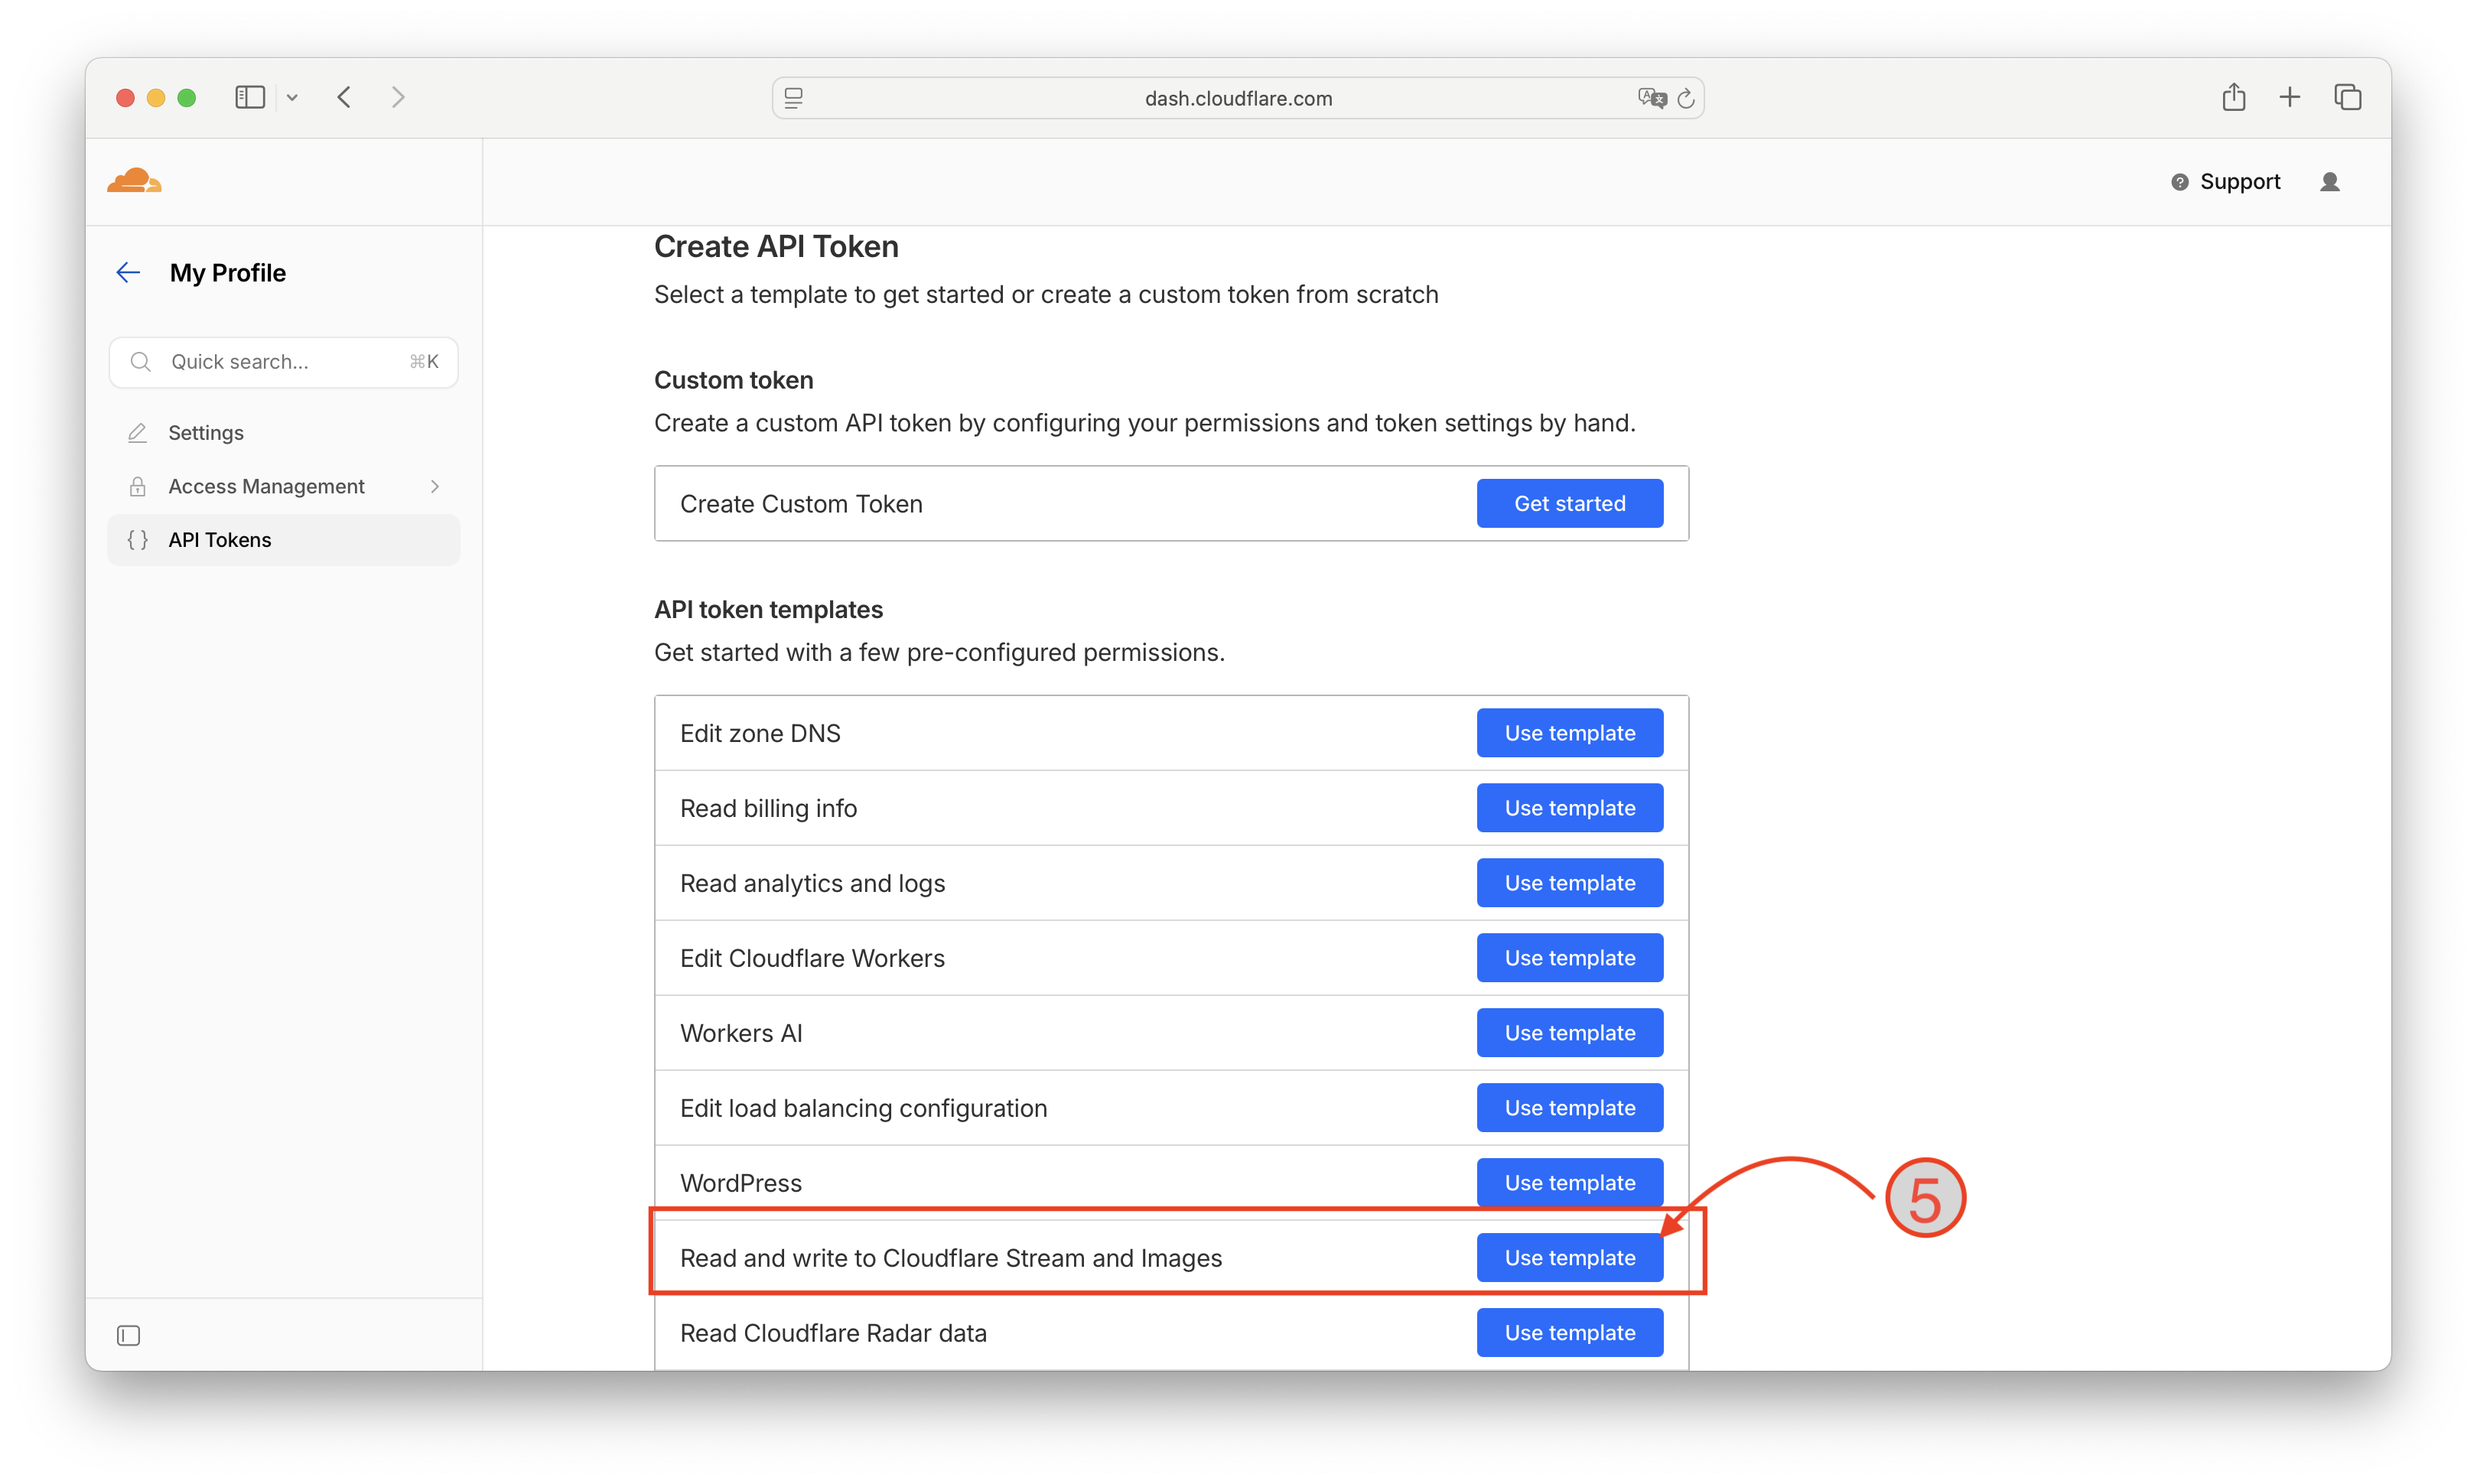
Stream:Read — connecting works because validation only reads, but uploads fail because they need Stream:Edit. The template above sets both for you.
Step 4. Confirm the token settings
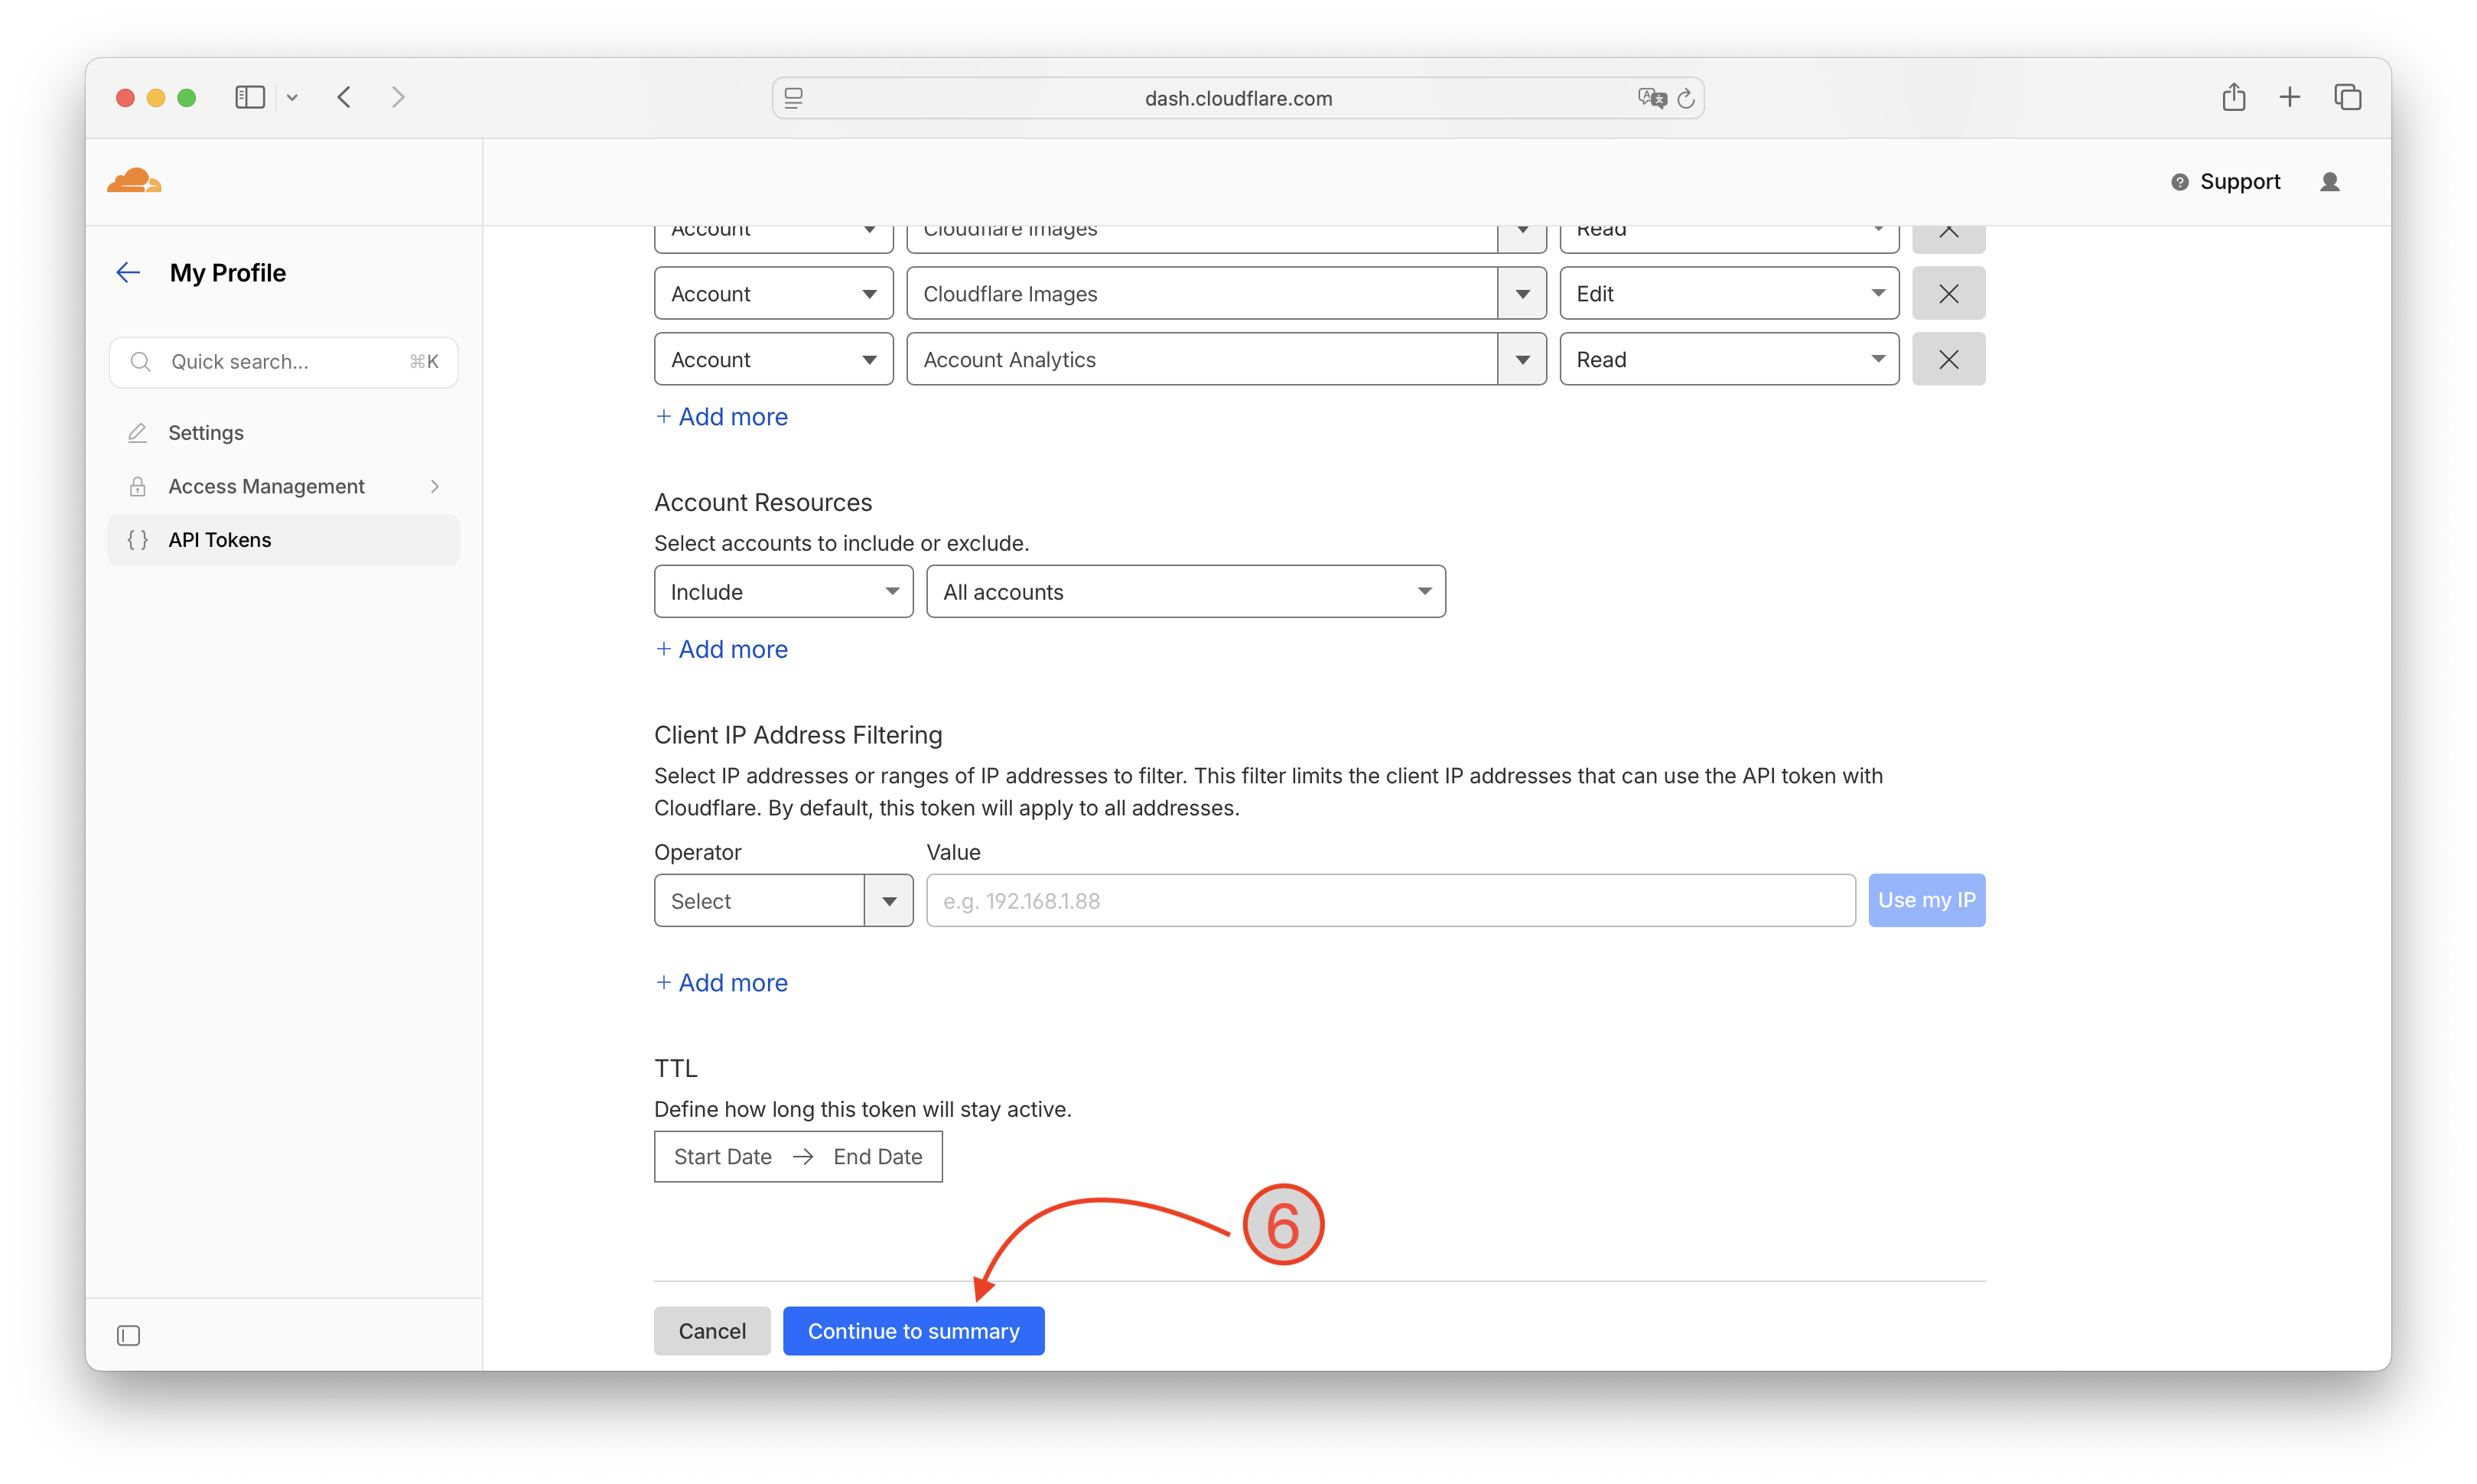
The template pre-fills the permissions: Stream:Read, Stream:Edit, Cloudflare Images:Read, Cloudflare Images:Edit, and Account Analytics:Read. Leave them as-is.
Under Account Resources, leave it set to Include — All accounts (or restrict to a specific account if you have several). Leave Client IP Address Filtering empty and leave TTL blank — adding either one is the second most common cause of "the upload worked yesterday and stopped working today" issues. Click Continue to summary ❻.
Step 5. Review and create
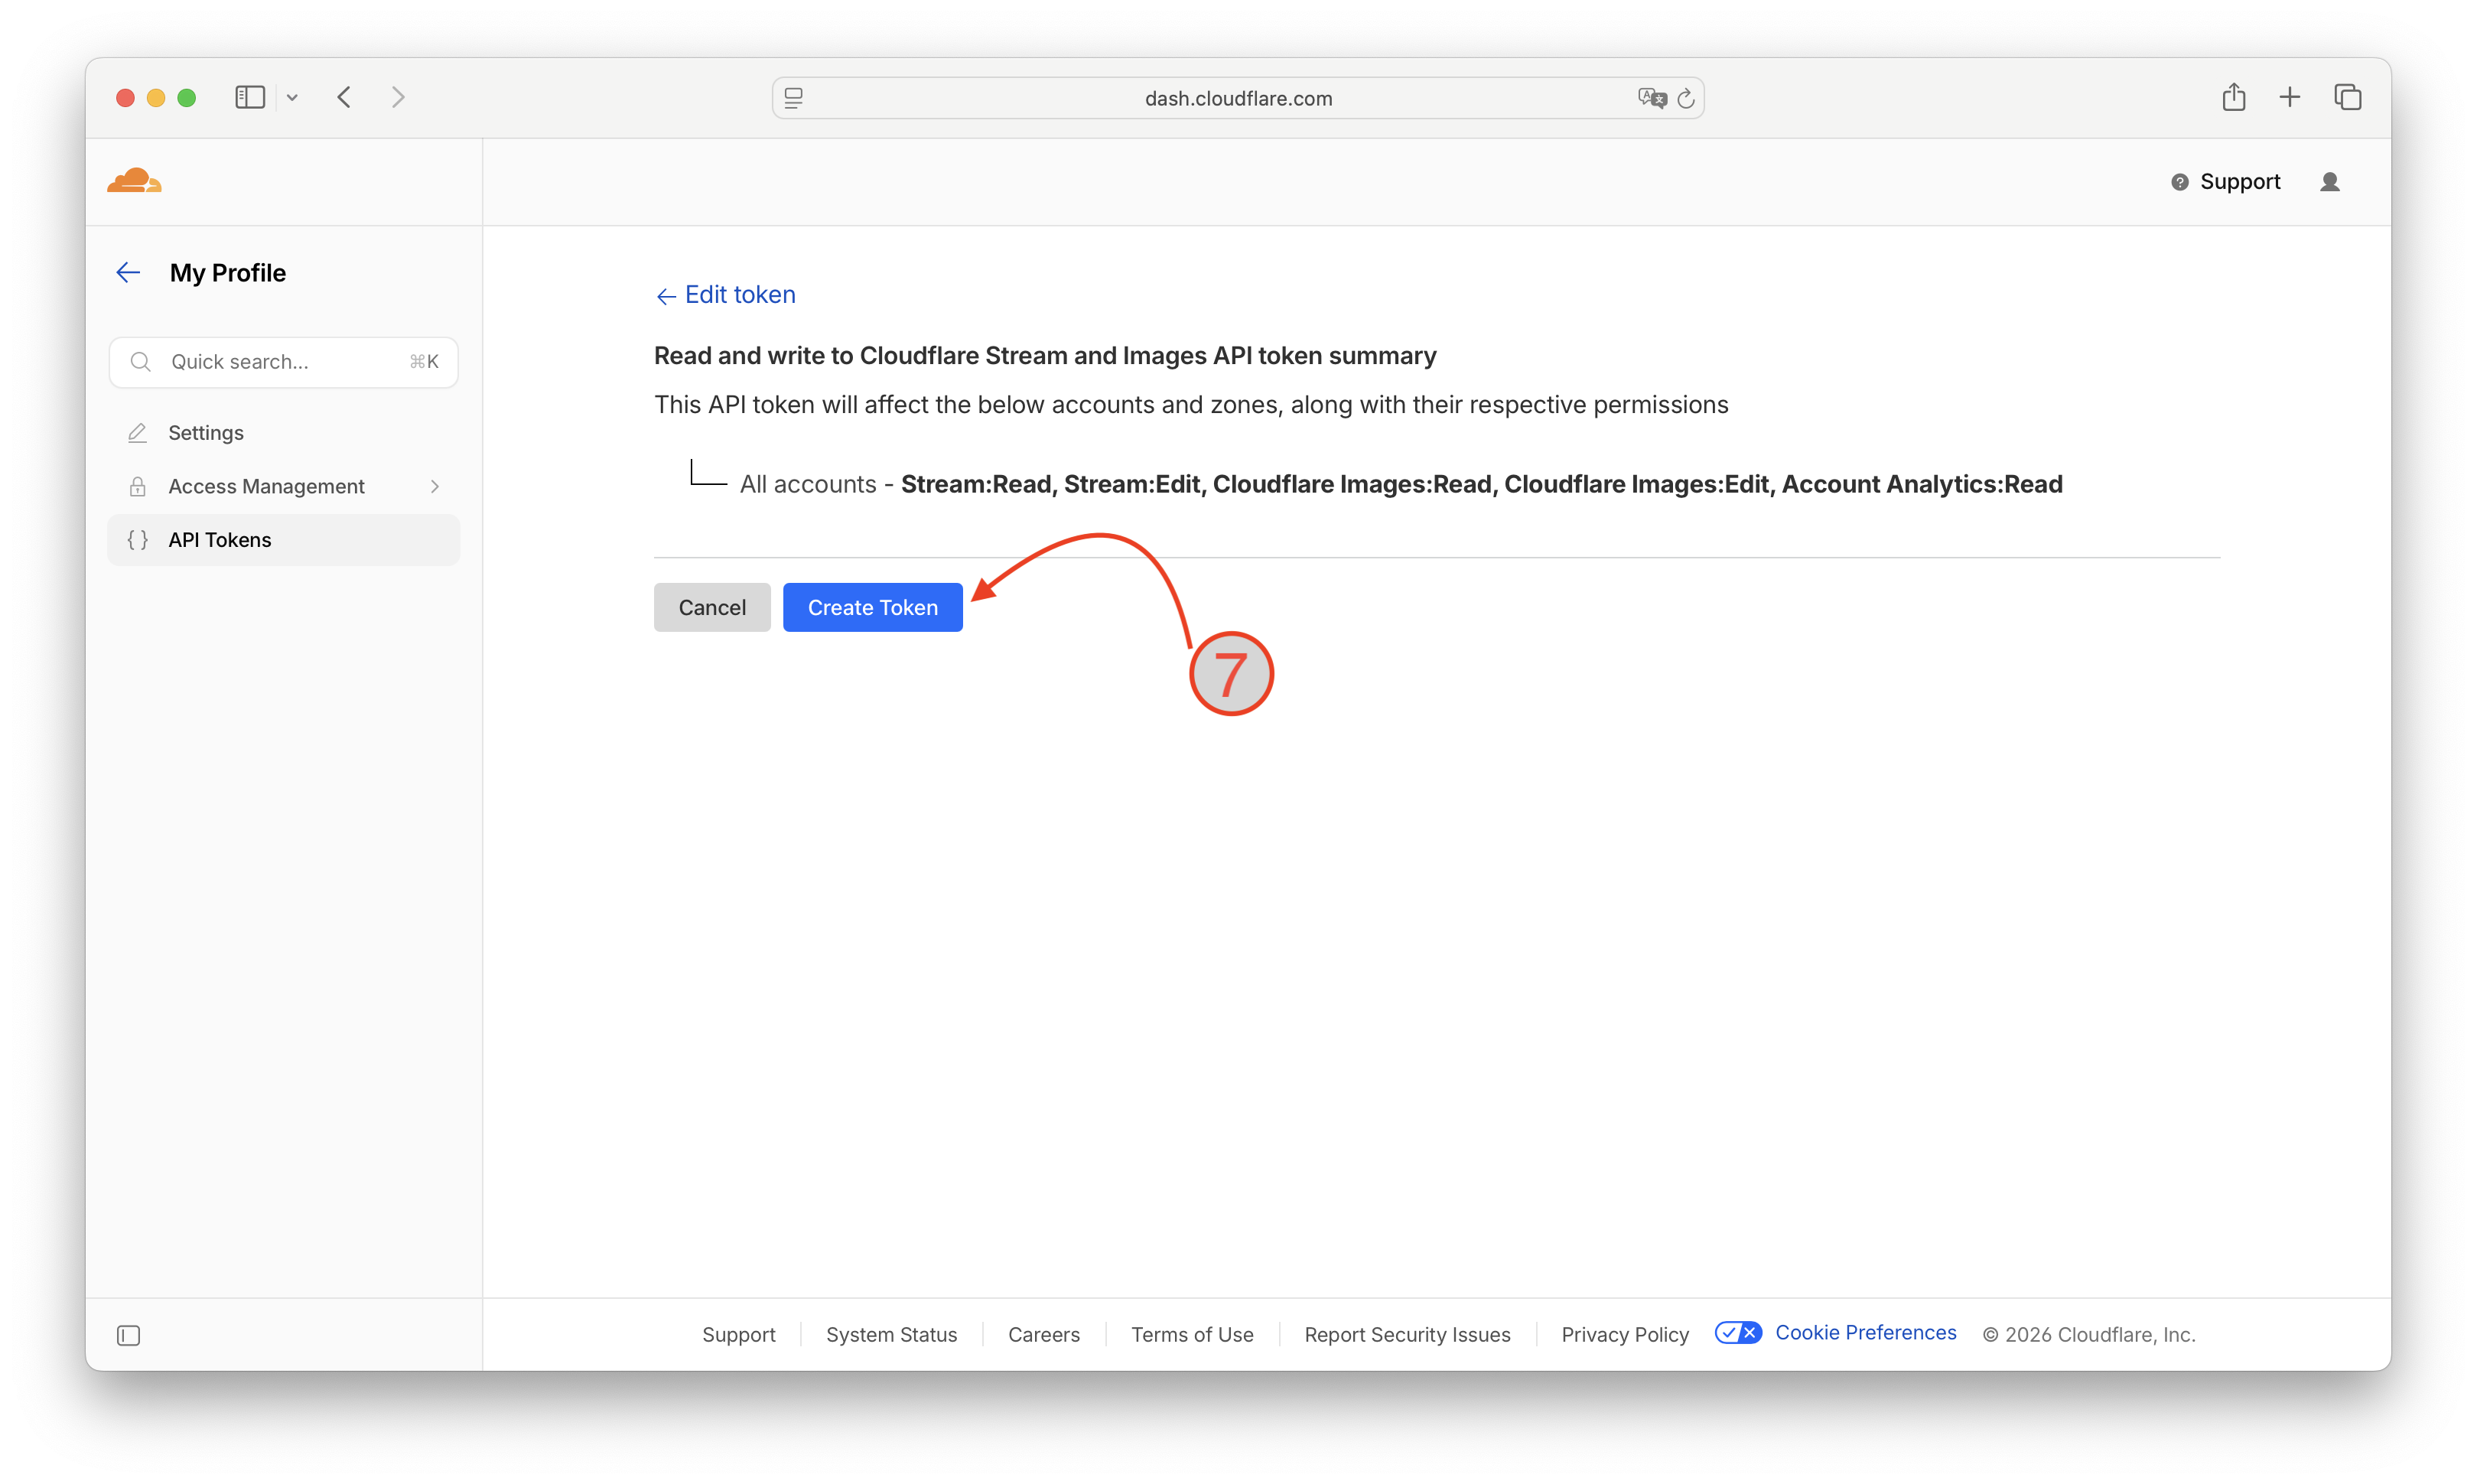
Cloudflare shows a one-line summary of the token: All accounts — Stream:Read, Stream:Edit, Cloudflare Images:Read, Cloudflare Images:Edit, Account Analytics:Read. Confirm it matches and click Create Token ❼.
Step 6. Copy the token immediately
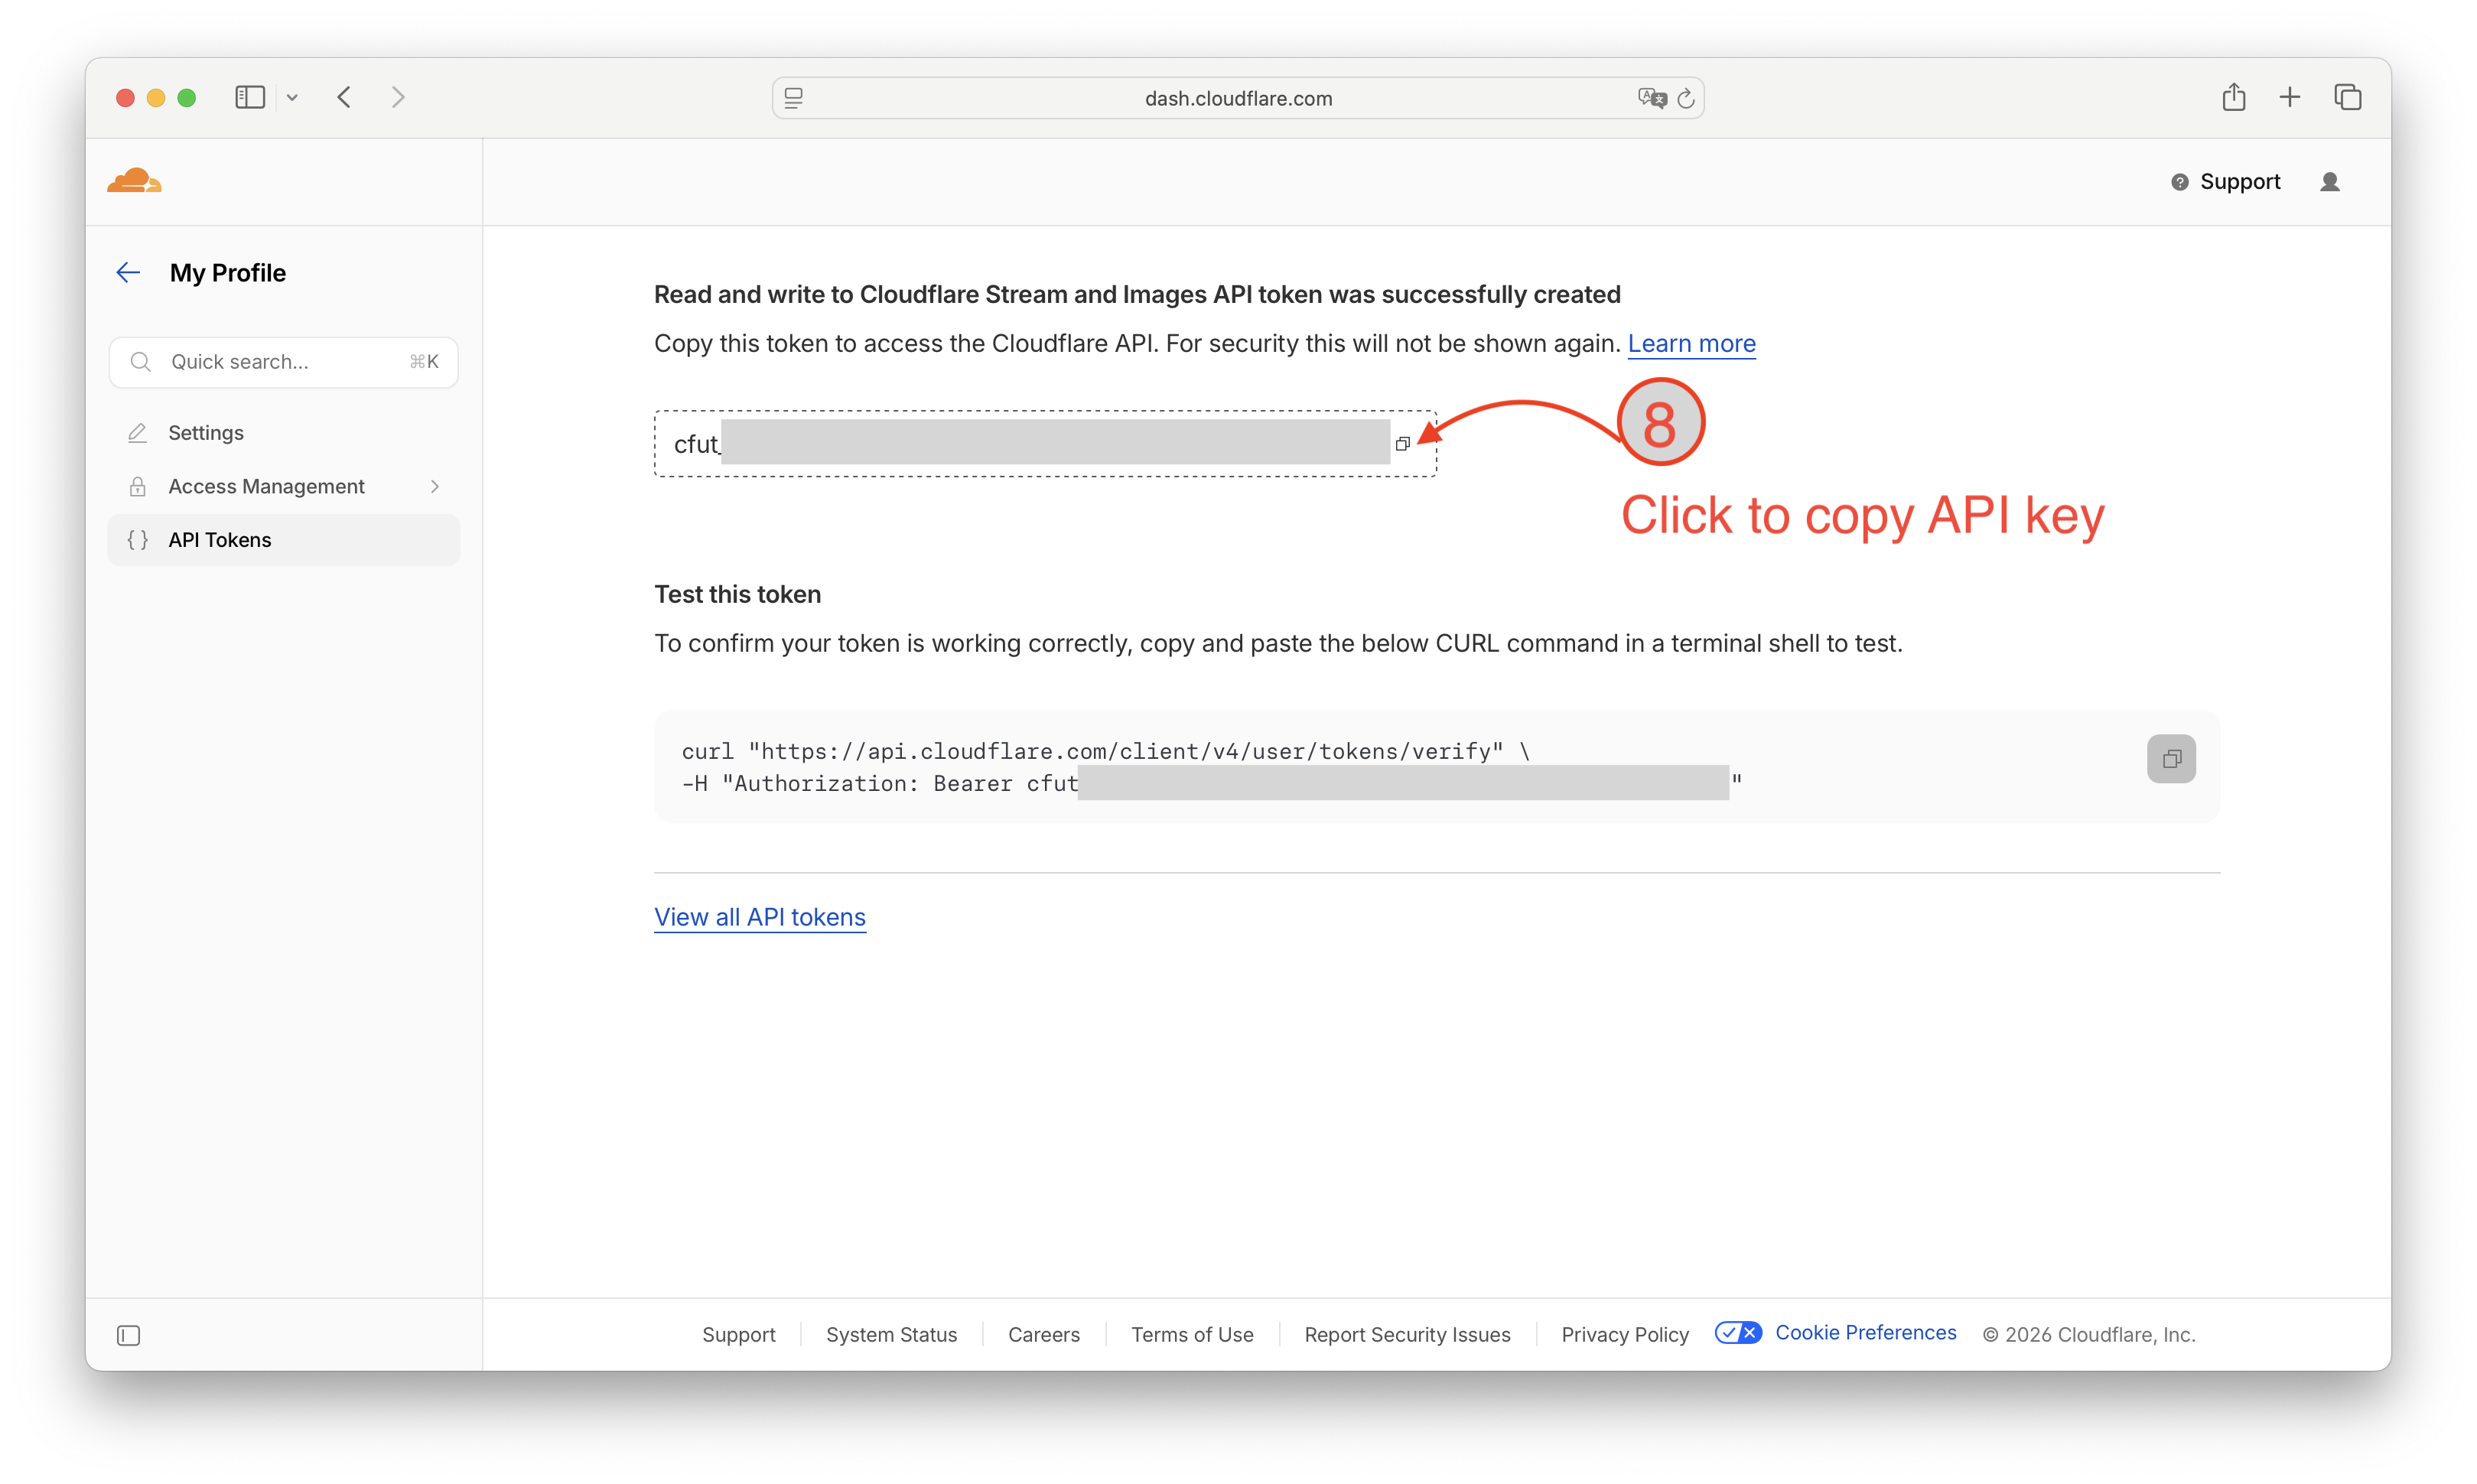
Cloudflare shows your new token (it starts with cfut_) once and only once. Click the copy icon ❽ and paste it somewhere safe — a password manager is ideal. If you close the page without copying it, you'll have to delete the token and create a new one.
Part 2 — Find your Account ID
Step 7. Open Cloudflare Stream
From the Cloudflare sidebar, expand Media and click Stream → Videos. On the right side of the Stream page, under Account details, you'll see your Account ID — that long hex string is what ReedTV needs.
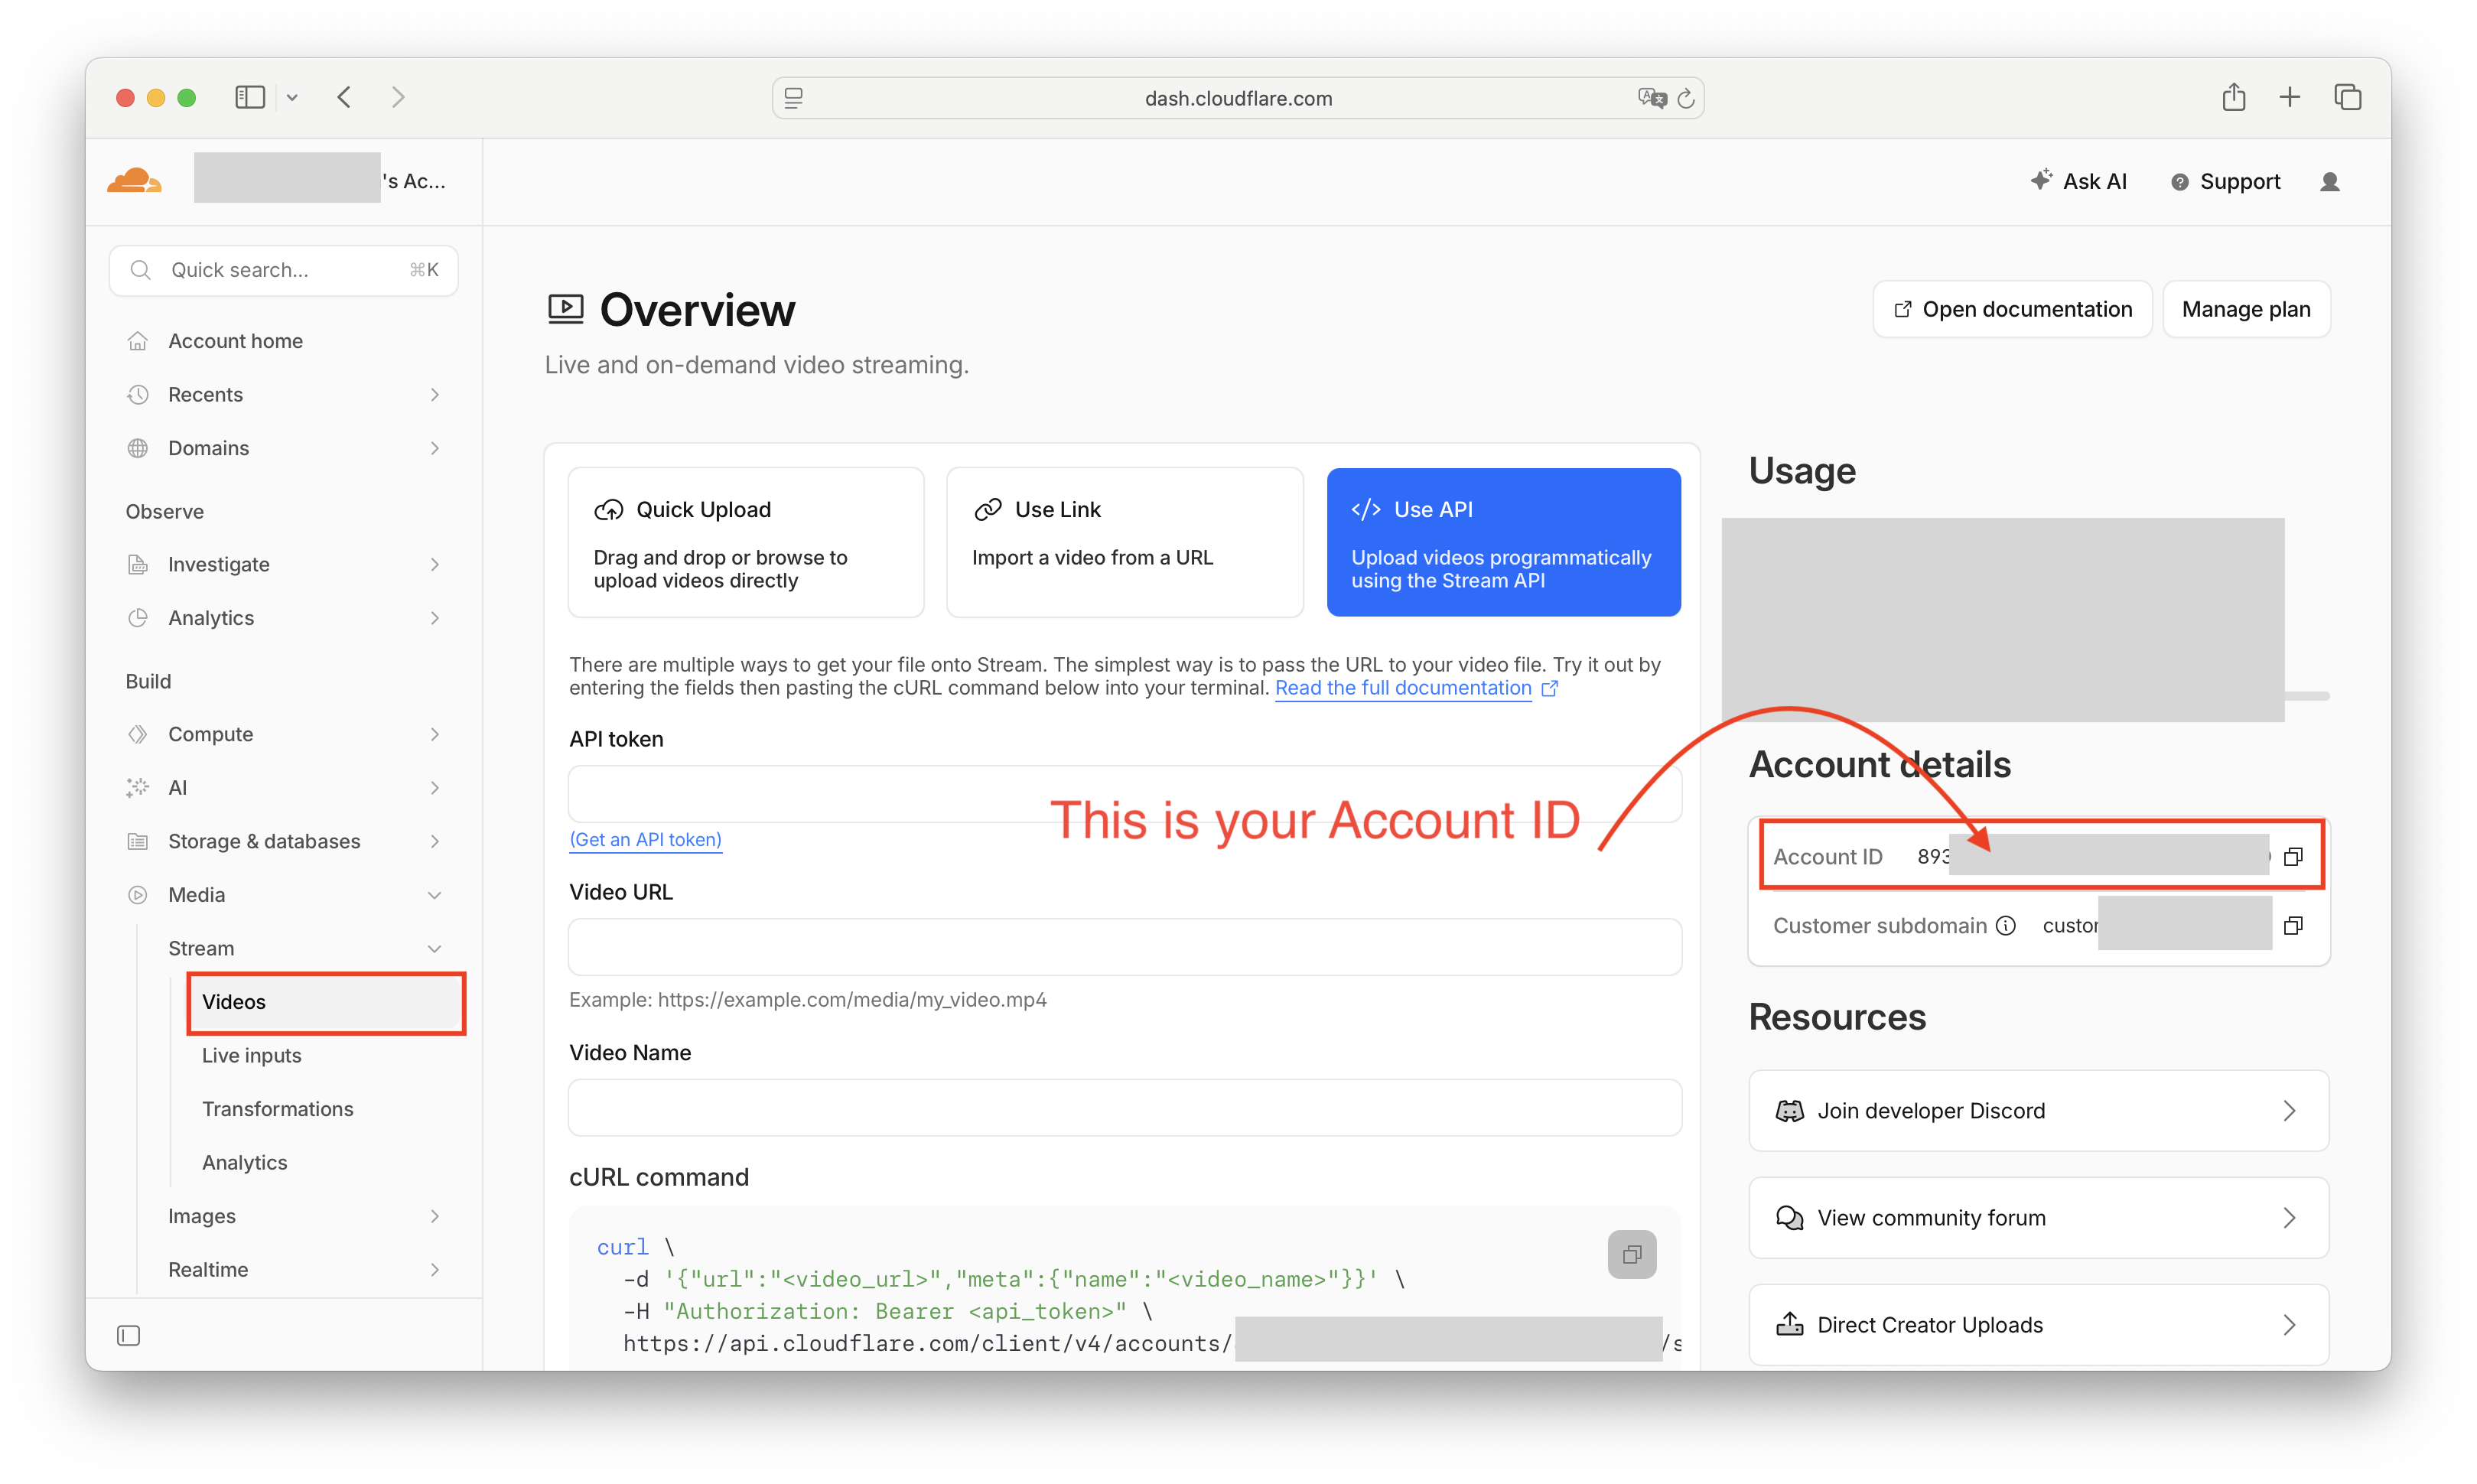
Click the copy icon next to it and save it alongside your token.
Part 3 — Connect it in ReedTV
- Sign in to ReedTV and open Settings → BYOA.
- Click Connect Cloudflare Stream account.
- Paste your Account ID and your API Token.
- Click Connect. ReedTV will validate the credentials, confirm Stream is enabled on the account, and you're done.
From here, every upload routes straight to your own Cloudflare Stream account. ReedTV doesn't touch the video files — we only store metadata and serve the watch / embed pages.
Troubleshooting
"Cloudflare rejected your saved API token (Authentication error)"
The token is being refused at authentication. The usual culprits, in order of likelihood:
- The token was deleted or rolled in the Cloudflare dashboard after you connected. Create a new one and reconnect.
- An IP filter was added that excludes Cloudflare Workers' IPs. Recreate without IP filtering.
- A TTL end date has passed. Recreate without a TTL.
"Cloudflare account does not have Cloudflare Stream enabled"
You haven't subscribed to Stream yet. Go to Stream → Videos in the Cloudflare dashboard and click Manage plan in the top-right. Stream storage starts at $5 per 1,000 minutes.
"Your Cloudflare API token is missing the required permission"
Your token was probably created from scratch with only Stream:Read. Delete it, go back to Step 3, and use the Read and write to Cloudflare Stream and Images template instead.
You're set
Once connected, your videos live entirely on your Cloudflare Stream account, you pay Cloudflare directly for storage, and ReedTV gives you the dashboard, analytics, embed customization, AI captions, and Patreon-friendly oEmbed links on top.